

Are you currently looking for help cleaning up your 3D Printer Nozzle?
If yes, you just have landed at the right place.
3D printing is a perfect way to look at things perfectly. It is the easiest way to understand the different concepts and to project the different models perfectly. But what if your 3D printer starts facing up issues suddenly and you get to know that you have to clean up the nozzle perfectly?
Got worried?
Just get relaxed, as we are going to provide absolute solutions for the same here.
How to Clean Nozzle 3D Printer
Table of Contents
3D Printer Nozzle cleaning can be a frustrating task, especially when you don’t have any idea about how to do it perfectly. The guide has been designed to throw all of your worries aside and to give you an absolute solution for cleaning up the 3D printer nozzle.
When it comes to 3D printing, the nozzle is the last thing that comes in contact with the 3D printed part. Only a perfect quality and well-maintained nozzle can ensure one has absolute 3D prints. And that’s why it gets quite important for a person to clean these nozzles perfectly.
There are different methods that one can use for cleaning up the 3D printer nozzles. Right from bruising up the nozzle to cleaning up the light clogging to using needles, acetone, and different other methods for heavy clogging you can easily choose any for finding your absolute solution.
We’ll provide you with a list of different solutions that you can use for 3D printer nozzle cleaner perfectly.
Why do we need to clean the nozzle of 3D Printers?
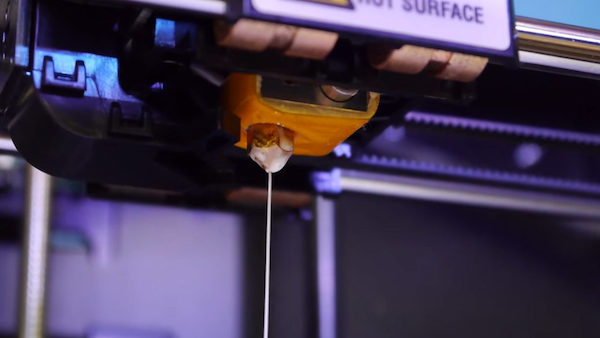
Whenever we use the 3D printer, the filament of the printer melts down and comes out of the nozzle. Consistent usage can lead to the stuck down of this filament in the nozzle and can clog your machine badly. Whenever you start facing issues like the filament not going through the nozzle or it coming out as stringy, it is a clear indication that you need to clean it immediately. The cleaning part of the nozzle can be easily done just by keeping it attached to your machine or by taking it completely. The cleaning process depends upon the clogs your 3D printer nozzle is having.
Also Read: How Clean 3D Printer Bed
How To Clean 3D Printer Nozzle Perfectly?
Cleaning up the 3D printer nozzle is of utmost required for ensuring the smooth running of the 3D printer. If your 3D printer suddenly has facing clogging issues, you can easily resolve them just by using the different methods we are going to provide you below:
Solution 1: Pull Out The Clogs From the Nozzle
It is one of the easiest and simplest ways for removing a clog from the nozzle perfectly. The best thing about this method is that you can easily implement it while keeping the nozzle in its place. The only things you have to do for pulling out the clogs from the nozzle are:
Unload The Filament
The very first thing you need to do in the league is to unload the filament available currently in your printer. You can easily do it by:
- Search for the Unload option available on your 3D printer’s menu. If you are using a program you can check it there as well.
- Now, select this Unload option and then wait till the nozzle heats up.
- Once done, now pull out the filament slowly and very carefully so that it could not cause any harm to your machine. If you are facing some issues, you can reheat the nozzle and can try to pull it again.
- Bingo! You have successfully pulled the filament out of the machine.
Preheat Nozzle
The nozzle of the 3D printer usually gets cooling down as it’s once after the unloading of the filament. So it becomes quite important for you to preheat it again for about 200°C or 392°F so as to ensure perfect removal of clog. The best thing here is that the majority of the 3D printers enable users to adjust the heat settings perfectly and that too in multiple parts and that makes the tasks even much easier.
- Go to the printer settings option and then search for the heating option there.
- Start heating the nozzle up to 200°C or 392°F.
- Once the nozzle has been perfectly heated up, it will perfectly loosen up the leftover filament that is clogging up the nozzle.
Push Clear ABS into the nozzle
The next thing you need to do in the league is pushing clear ABS or nylon filaments into the nozzle. Both of these options often do come up with high melting points and that makes it easier for the users to control the pickup clogs efficiently.
- You can add the end of these filaments into the hole of your nozzle and have to push the filament through it.
- We would advise you to keep your ABS or nylon filament up there in the hole at least for about 10-15 seconds.
- Once you have done with it, take the filament out of the nozzle.
- A residue from the nozzle can be easily seen on the filament. Just cut the dirty end of the filament with scissors.
- We would advise you to repeat the same process multiple times until the dirt and grime on the nozzle get perfectly cleaned up. Make sure to cut down the dirty end of the filament every time you remove it from the nozzle. The same is quite important to avoid putting the grime back into your nozzle.
- If you are planning to use some other material instead of ABs or nylon filaments make sure to use the one that is having higher melting points only.
Solution 2: Deep Clean with Acetone
If the nozzle of your 3D printer is clogged, you can try cleaning it with acetone. This process is easier and will only take a few minutes. The detailed process you have to follow up on here is:
Scrub the Stuck on Material
The very first thing you have to do in the league is to scrub the stuck-out material on and outside of the nozzle. You can easily make use of a wire brush for scrubbing it perfectly. Make sure to go through the nozzle packaging in detail so that the wire brush you are going to choose on it would not harm it.
- We would advise you to leave the nozzle on your printer only. The nozzle at the printer will be held securely throughout the process.
- You should have to work in back-and-forth motions consistently for scrubbing the nozzle. Don’t forget to apply some pressure while brushing so that it could scrape out every filament residue effectively.
- Once you have completed working in one direction, just change the angle and direction of your brush and start doing the same process again.
Heat the Nozzle
The next thing you have to do in the league is to heat the nozzle for about 150°C or 302°F. If you heat the nozzle before trying to clean it, it will be easier to remove the dirt and grime. You can use the temperature setting options to set the temperature to 150°C or 302°F so that the metal expands and is easier to clean.
Make sure to remove the grime and dirt in the heated nozzle only as if you will not do it, it can damage your threads and nozzle badly.
Remove The Nozzle
The next thing you have to do in the league is to remove the nozzle from the 3D printer. Once the nozzle of your 3D printer is perfectly heated up you can make use of a wrench for screwing up the nozzle from it. You just have to rotate the wrench in a Turning anti-clockwise direction to remove it perfectly.
Make sure not to touch the nozzle with bare hands as it can cause serious harm to your hands. Also, set up the nozzle on a surface that is not affected by heat after the removal.
Submerge Nozzle into Acetone
Once you have removed the nozzle from your 3D printer perfectly, the next thing you have to do is to submerge it into the acetone solution for about 15 minutes to ensure deep cleaning of the nozzle.
- To ensure the same, you can fill up the container with enough acetone so that the nozzle of the 3D printer would completely get submerged in it.
- Once you have added the nozzle to the acetone solution, just leave it there for about 15 minutes. The acetone solution will break down the grime and dirt perfectly and will clean up the nozzle perfectly.
- After 15 minutes, just take out the nozzle from the acetone solution and dry it with a paper towel or a lint-free cloth.
- If you are finding it hard to get the acetone solution, just let me make things easier for you. The nail polish remover that we commonly use is the acetone solution and can be easily purchased from nearby stores.
Heating the Nozzle
- After you clean the nozzle with acetone, you need to remove the residue. To do this, heat the nozzle first.
- You can make use of a heat gun for the same. Set up a heat gun in such a way that it is pointing straight up.
- Now turn the heat gun on and then grab the nozzle with a pair of pliers. Just make sure to hold it directly above the heating unit.
- Let the nozzle heat up completely and keep on rotating consistently so the heat is distributed evenly.
- It is the perfect timing for the filament residue if any is loosened up more.
- Make sure to do the process for about one minute and once you have done with it, just turn off your heat gun and set it aside.
- The heat gun can cause serious harm to anyone so make sure not to point it at anyone.
Push Clog Through The Nozzle
The last thing you have to do in the league is to push any clog through the nozzle. We would advise you to use a thin wire or a needle for ensuring the safe pushing of clogs. You can easily do the same by:
- Pick up the nozzle with your pliers. Be careful not to drop it.
- Scrape the sides of the nozzle with a wire or needle until the clog is gone.
- Check to see if the clog is gone by looking through the nozzle of your 3D printer.
- If it has been more than 2-3 minutes and your nozzle is still not clean, heat it up again so that the filament doesn’t solidify and you can remove the clog from the nozzle.
Also See: Delta 3D Printers Review
Conclusion
Cleaning up the nozzle of a 3D printer is not such a hard task that you can’t perform by yourself. You will need to be patient and know how to clean things properly. This way, you can clean your 3D printer without breaking it. We have two different methods that you can use to remove clogs from your 3D printer. Just make sure to go through the kind of clogging your 3D printer nozzle has before using the above methods.